Booking Rides
Standard Rides
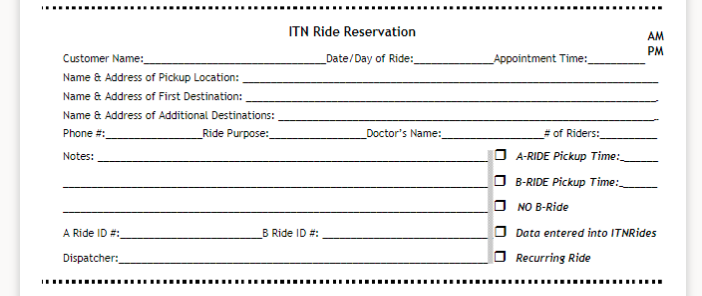
Riders can request rides through their portal, but many will call to book rides if given the option. You will have a ride reservation slip that you can use to capture all the pertinent information if you are not able to enter the ride into the system while talking with the rider.
Ride 1:
Ride 1 is the initial ride you are entering for the rider, usually from their home to another location. (The rider does not have to be picked up at home, but most are).
Click the “Book a Ride” tab at the top of the page. This will open the Add New Ride screen.
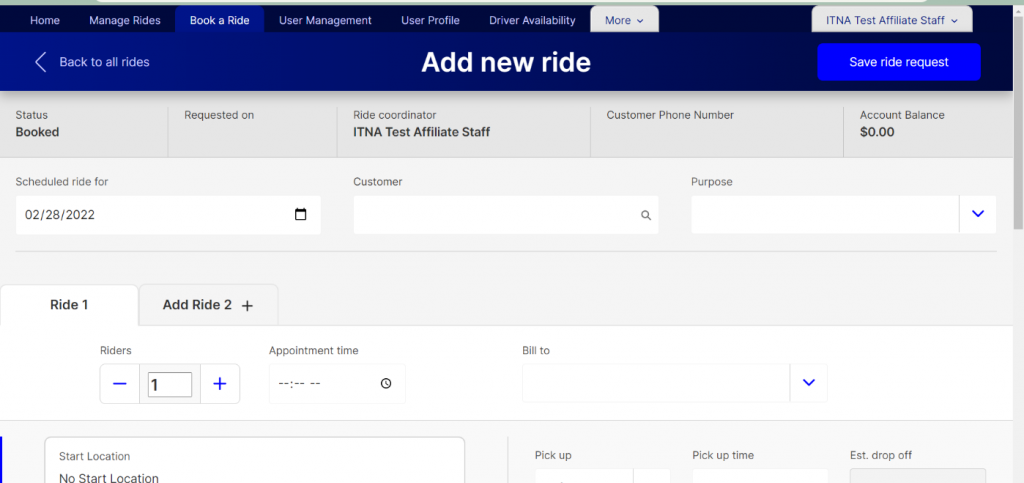
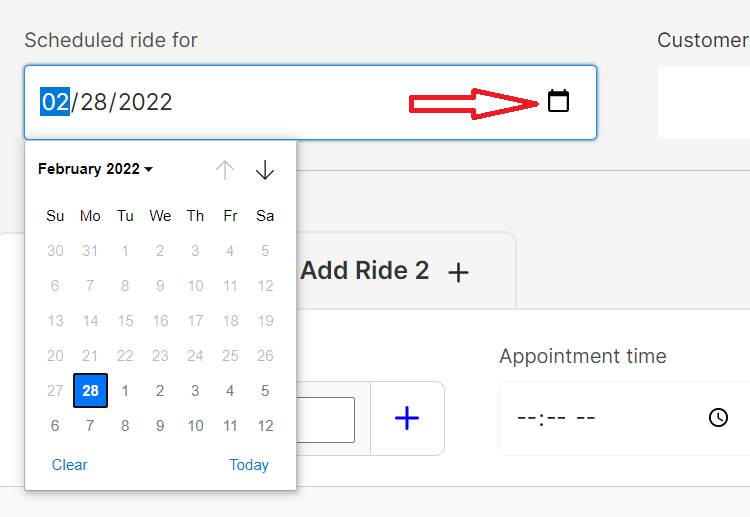
The first box to fill in is the date. The date will default to the next day, but you can change it to any day. Type the date in the box or click on the calendar to open a calendar to select the date.
Enter the rider’s name in the Customer filed. As you type, the name should appear below. Click on the name to select the person. Once the person is selected, their information will begin to populate the fields below.
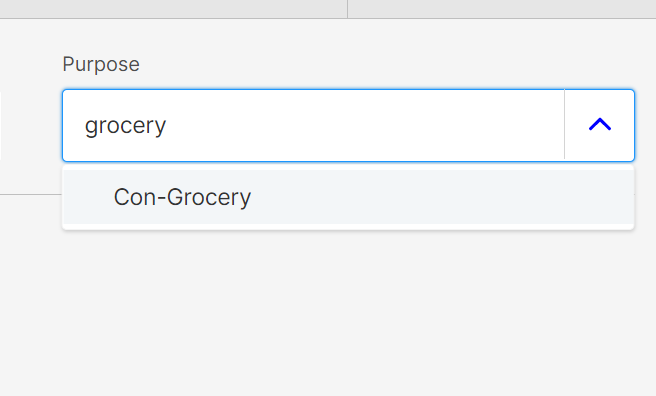
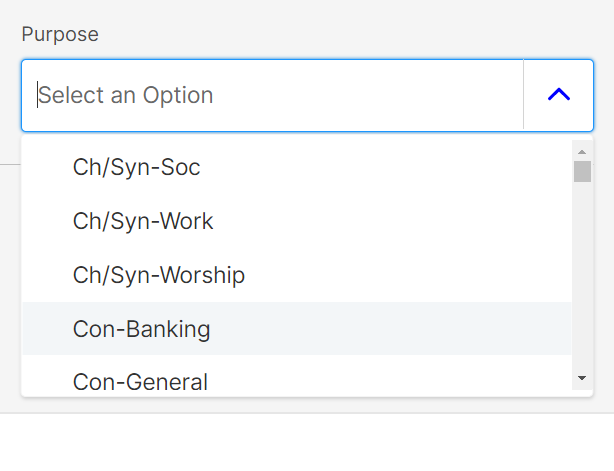
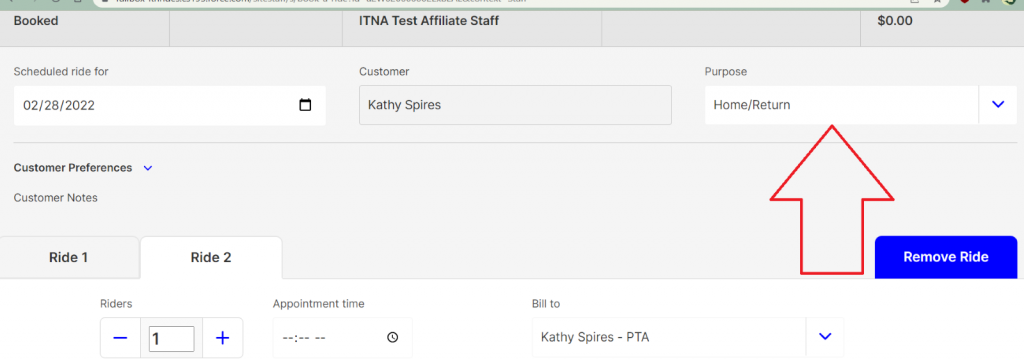
Choose the ride purpose. You can type into the box, or scroll through the list to find the purpose.
If there will be more than one passenger taking the ride, change the number of riders in the “Riders” field using the plus and minus on either side of the box.
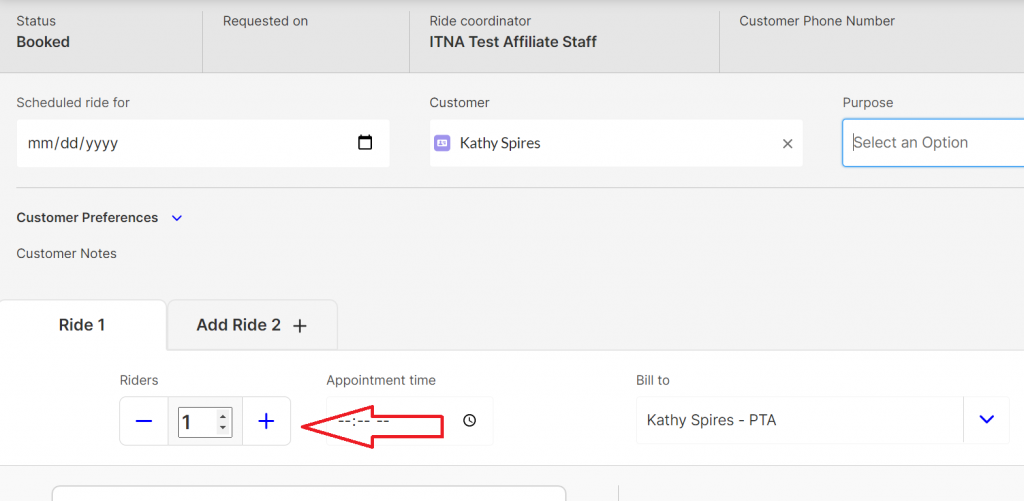
Enter the appointment time if applicable. If you are used to typing in military times, you can still do so, but the system will convert it to the 12 hour time, changing it automatically to PM if it is 13-19 for hours. You can also use the arrow buttons to select AM or PM when typing in the time, with up entering AM and down entering PM.
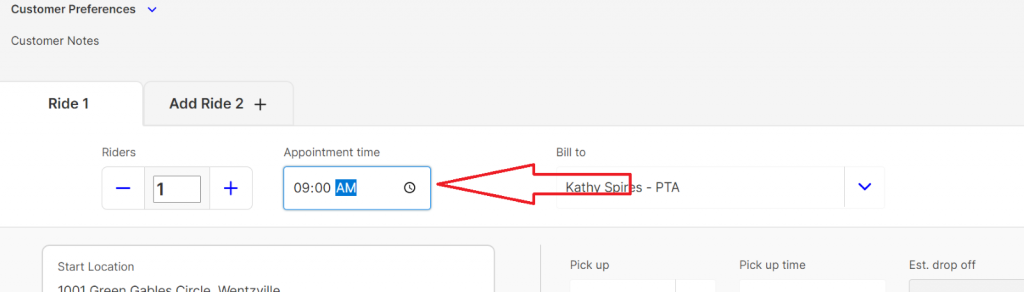
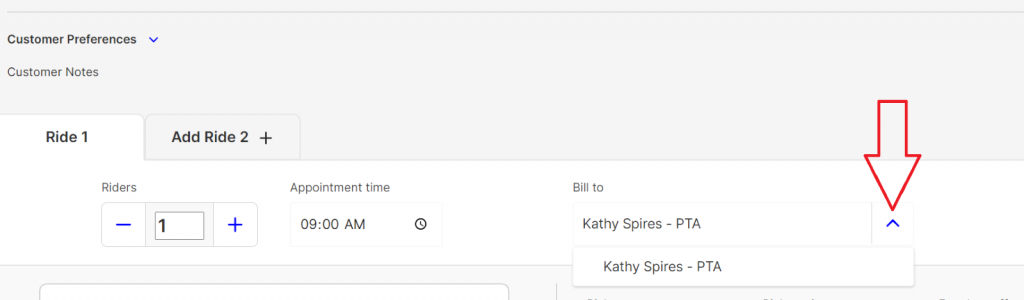
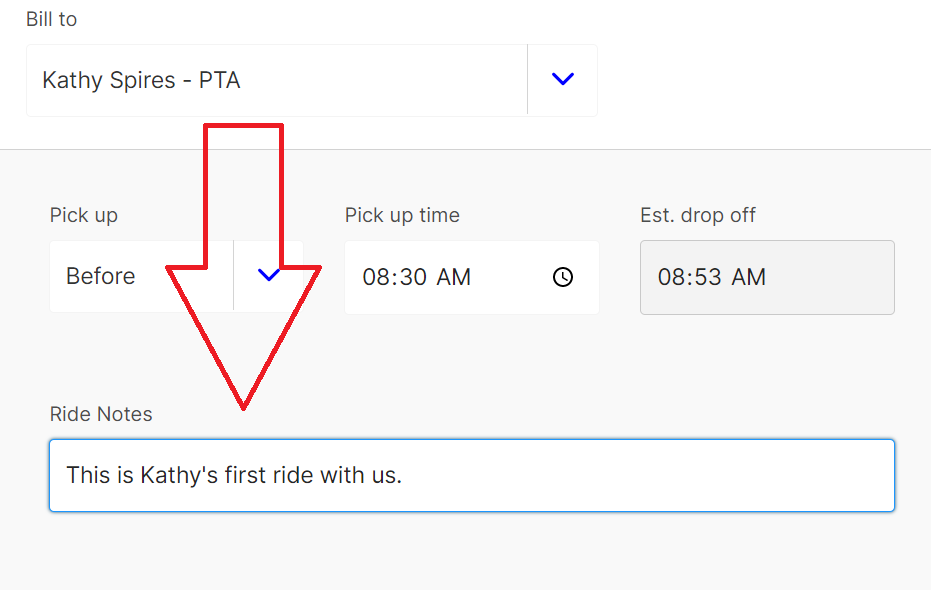
If needed, adjust the Bill To for the ride. This should only be adjusted if someone other than the rider’s account is billed for the ride. Click on the down arrow to see any other Bill To’s that are connected to the customer’s account. This is often used for Ride Services accounts.
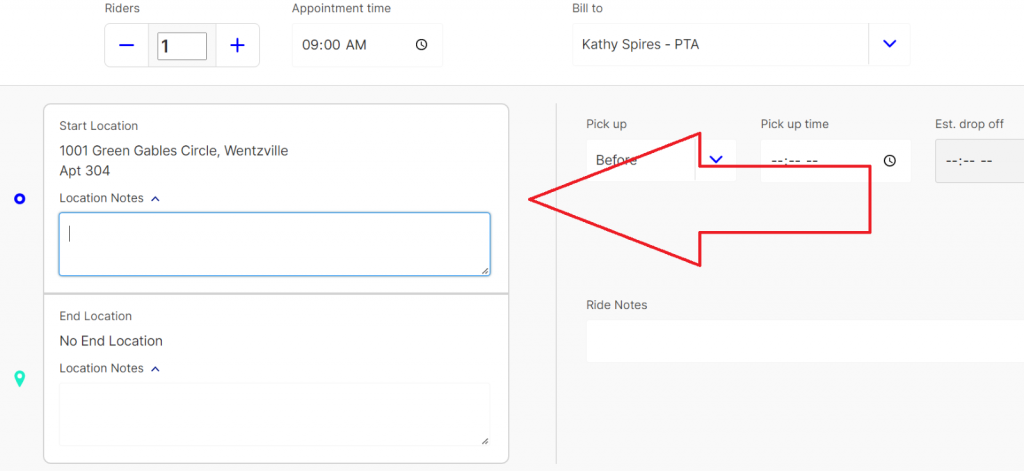
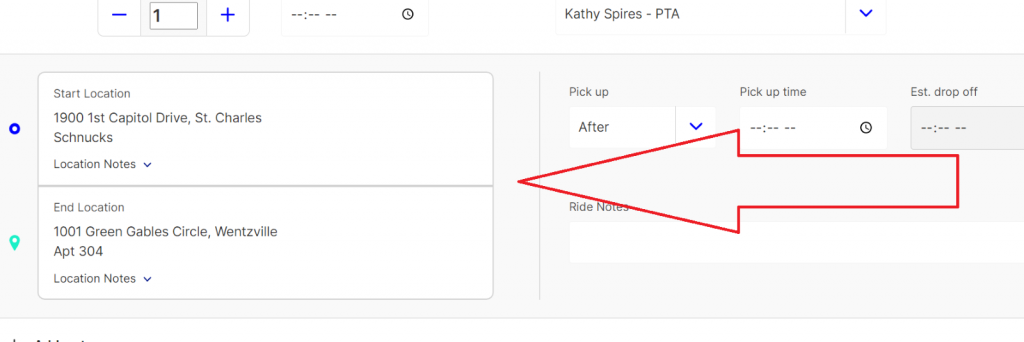
The rider’s home address will be auto-filled in the start location box. Change this if they will be picked up somewhere else. Enter any notes needed in locations notes. (Example- please go to the side door.)
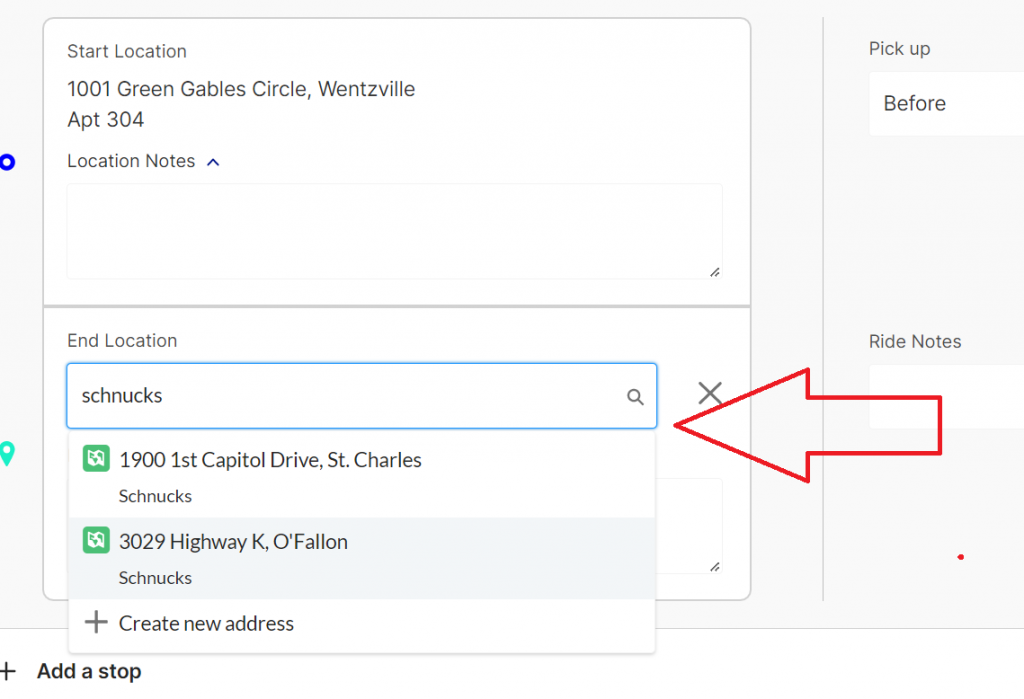
Enter the rider’s destination in the End Location field. You can type in the address, or the address name (if you have saved names with addresses you entered). If the ride is to a new location, you can enter a new address at this time. (See Entering an Address). Once you enter an address, you can also enter any applicable location notes that would help the driver.
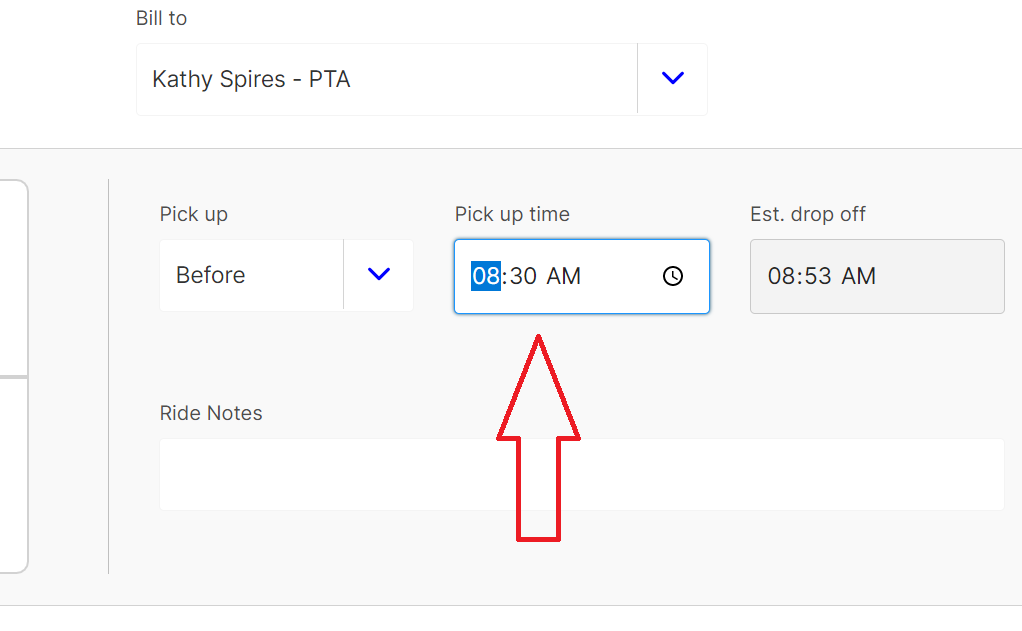
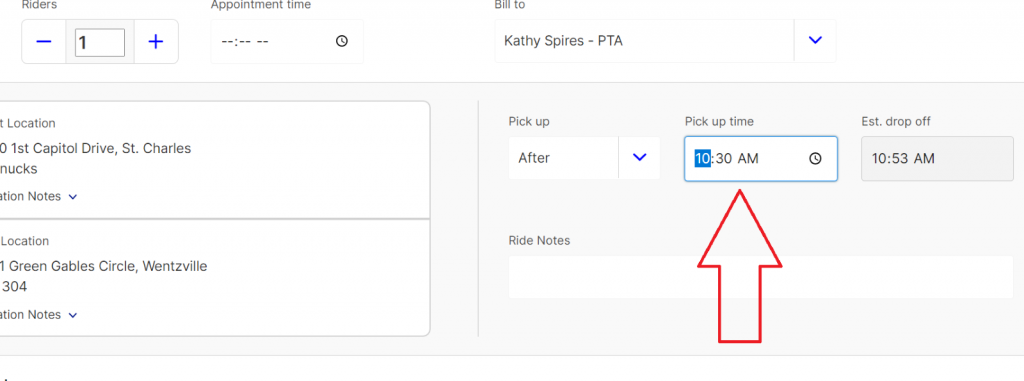
Enter the pick up time in the Pick-Up Time field. The box to the left will be set to Before as the option, leave this alone. The estimated drop off time box will automatically fill in. If you are used to typing in military times, you can still do so, but the system will convert it to the 12 hour time, changing it automatically to PM if it is 13-19 for hours. You can also use the arrow buttons to select AM or PM when typing in the time, with up entering AM and down entering PM.
Enter any special notes for the ride. Examples of things that would go in this box: a note about the appointment the rider is going to, a rider request for the ride (like calling when you arrive).
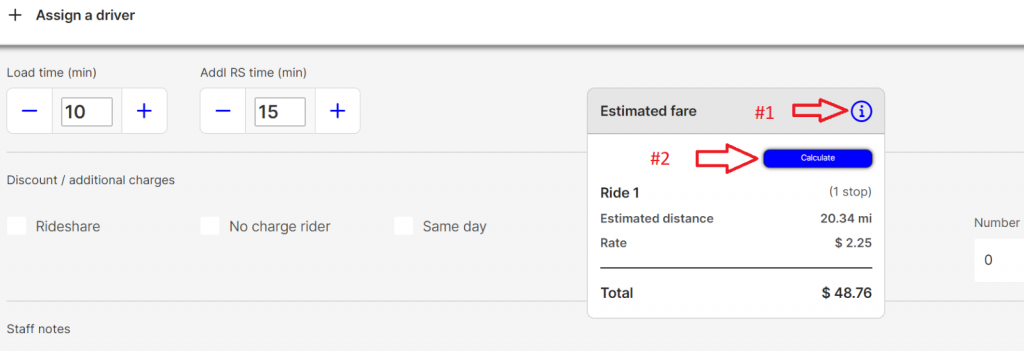
You can see the estimate of the charge for this ride by clicking on the I in the Estimated Fare box. This will open the option, click calculate to see the estimated charge. Click the I again to close the box.
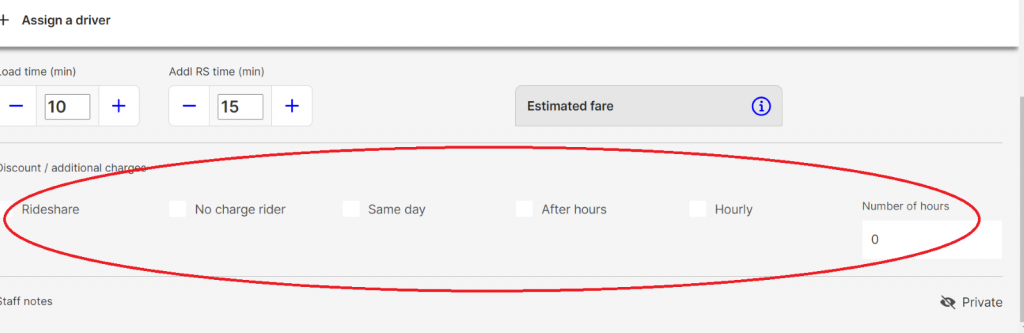
Use the Discount/Additional Charges checkboxes to select any that apply to the ride. These include
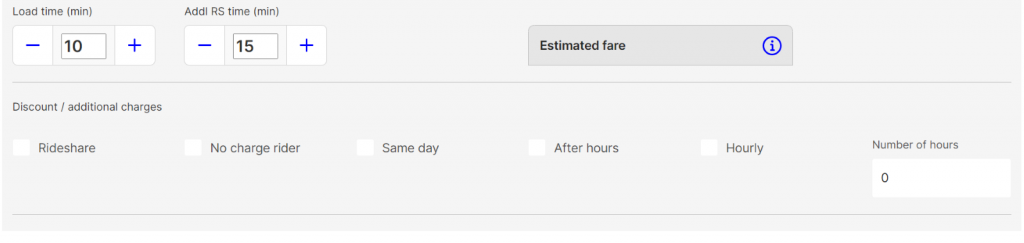
Rideshare– There will be two or more people sharing the ride and getting a rideshare discount
No charge rider– There will be an additional rider in the car that you will not charge for (example: a personal care aide) If using this, make sure you have adjusted the number of riders (Step 5)
Same Day– Ride was booked on the same day it is occuring (Generally costs more if you charge for rides)
After Hours– This ride occurs after regular operating hours (Generally costs more if you charge for rides)
Hourly– The driver will be staying with the rider and waiting for them over a series of stops. If this box is checked, an hourly fee applies in addition to any ride charges.
If you are taking the person home as well, move on to entering Ride 2. Ride 2 must be entered before saving Ride 1, or the form will reset.

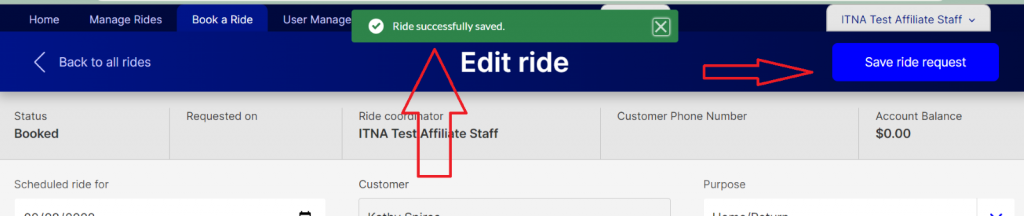
If it is a one way ride, press Ctl+S to save or scroll to the top of the page and click on “Save Ride Request.”
A green box stating “Ride Successfully Saved” will show at the top of the screen.
Ride 2
Ride 2 is usually the rider returning home from their first trip.
Click on the “Ride 2” tab to begin entering the second/return trip.
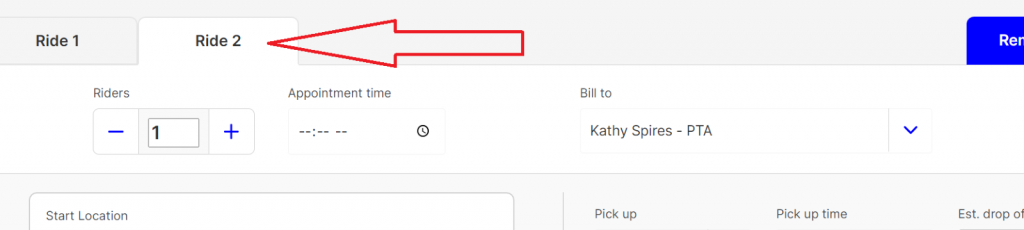
The purpose will auto-fill to “Home/Return”. Adjust this is the ride purpose is different.
The start location and the end location from Ride 1 will have reversed, adjust this if required.
Enter a time in the pick-up time field. The box to the left will be set to after, leave this as it is. If you are used to typing in military times, you can still do so, but the system will convert it to the 12 hour time, changing it automatically to PM if it is 13-19 for hours. You can also use the arrow buttons to select AM or PM when typing in the time, with up entering AM and down entering PM. If the rider would prefer an early driver to waiting for pick-up, this can be toggled to “Before”.
If any of the “Discount/Additional Ride Charge” boxes were checked on the first ride, they will be checked on the second ride. Adjust this is necessary.
Press Ctl+ S or scroll to the top of the page and Save the ride.