
Entering New Addresses
Addresses are entered as part of the member or driver application, through ITN Locations (under the More menu), or when you are booking rides. Always check to see if an address is in the system before adding it. This can be easily checked by entering it as a destination on the ride booking screen. New addresses will be checked against the GIS system we use, and only valid addresses will save. If there is an issue with the address, the system will not let you save. The easiest way to enter a general address is through the ride booking screen. If the location will be participating in a ride subsidy program like Ride & Shop or Healthy Miles, it should be entered through ITN Locations.
Naming Addresses for Easy Searching
When entering an address for a ride, you can type in the street address or the business name. If you have named addresses as you enter them, it will make for easy searching. This is helpful because many of your riders may know the name of the place they are requesting a ride to, but not the exact street address.
Apartment and Suite Numbers
Suites and Apartment numbers are handled differently depending on how they are entered. Addresses connected to people are primarily entered through the applications, which have Address 1 and Address 2 boxes. When those boxes are present, apartment and suite numbers should go in the Address 2 box. On the Add a Ride Screen, the Add New Address screen only has one Address box, so apartment and suite numbers should be entered in that line, along with the street address. Be sure to add any location notes or business names that will make finding the location easier for drivers.
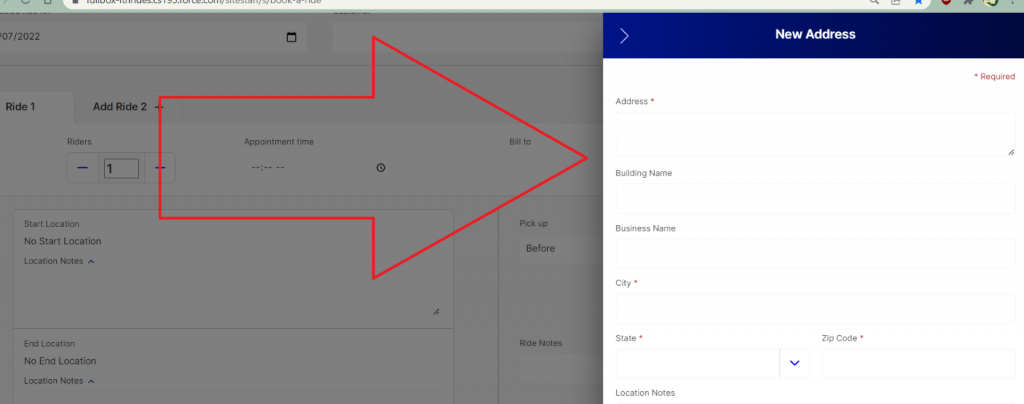
Entering Addresses Through the Ride Booking Screen
Begin entering an address in the end location box of the ride booking screen, if no match is found in the system you will see “Create New Address” underneath the box you are typing in.

Click on “Create New Address” and the New Address drawer will open for you to enter the information.
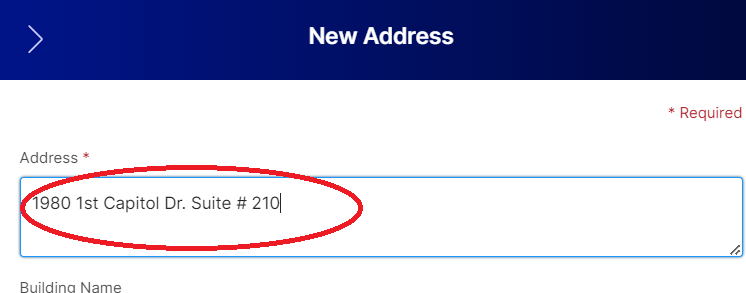
Enter the address, including any Suite # or Apt # in the Address box.
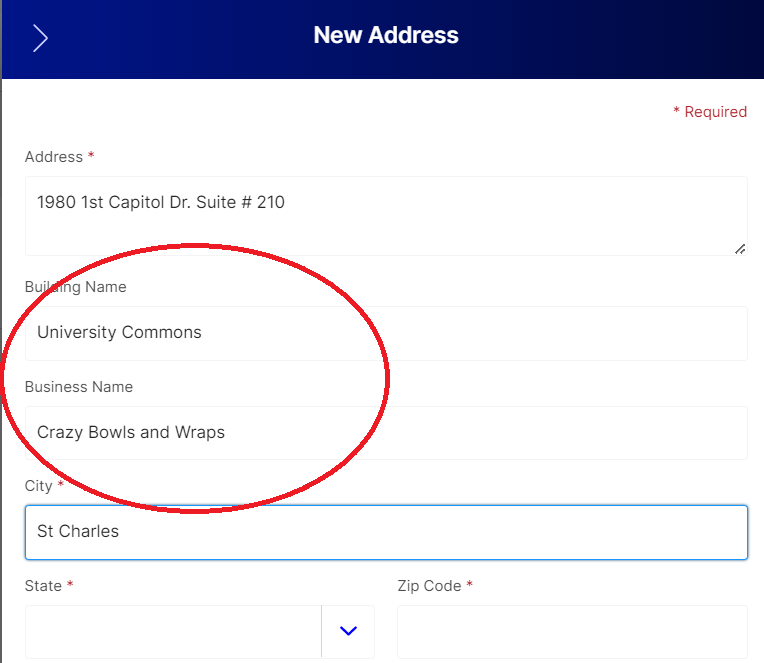
Be sure to add the Building or Business Name if applicable, as this will make it much easier to search for the address in the future.
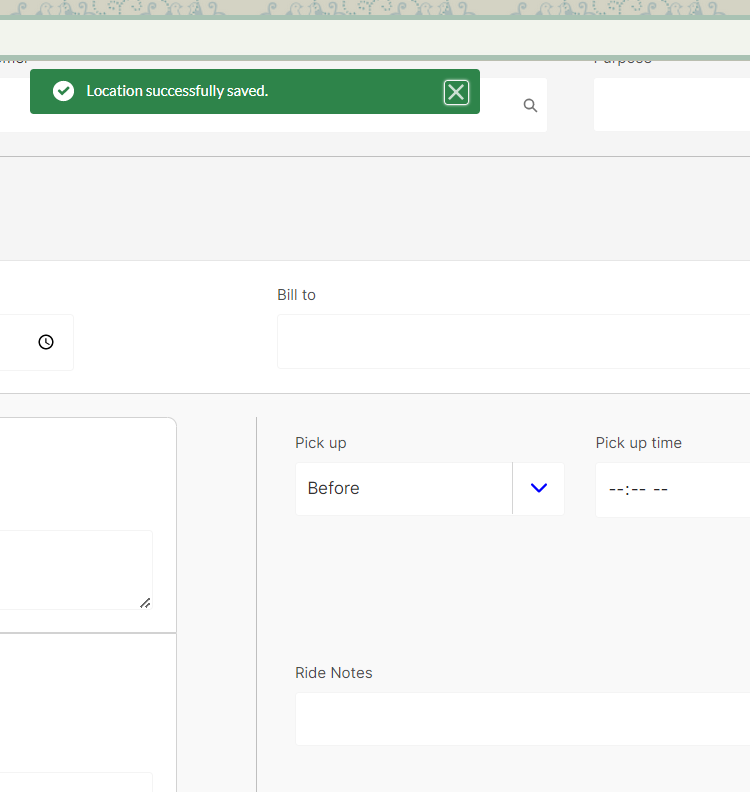
Save the address, and you will see a green box showing that it has been successfully added. The pop-up will close and then you will return to the Add a Ride Screen.
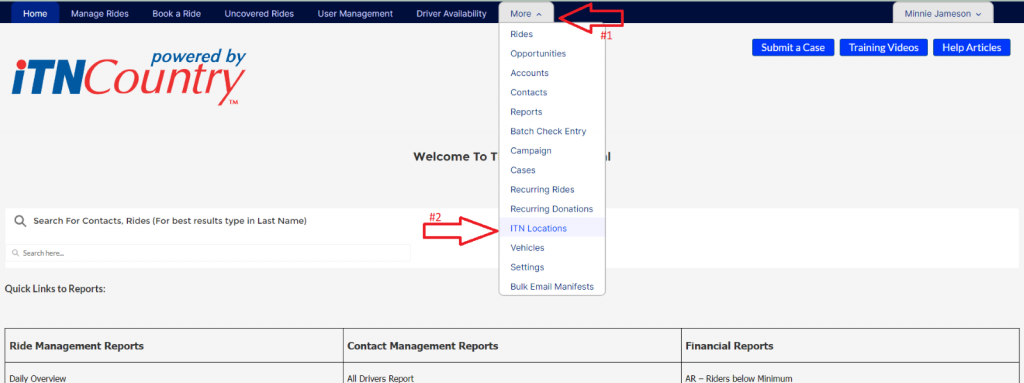
Entering Addresses Through ITN Locations
Open ITN Locations by navigating to the “More” Menu on the homepage and choosing ITN Locations.
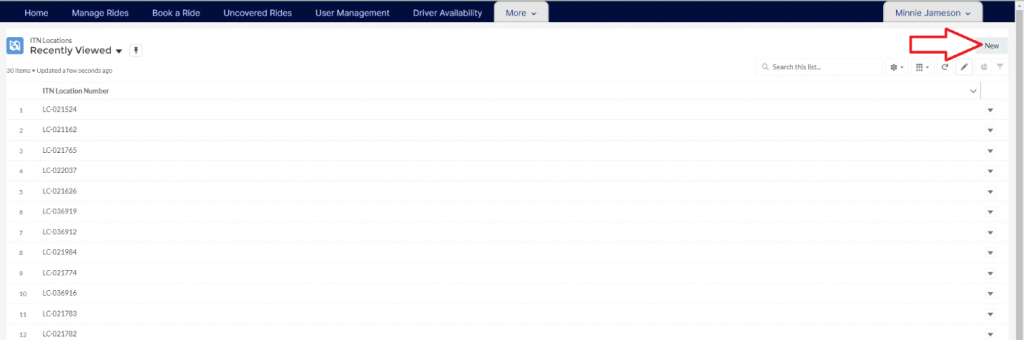
Click on new in the upper right hand corner.
A popup form will open for you to fill out. Fill your site name in first, and then scroll down to Address Details.
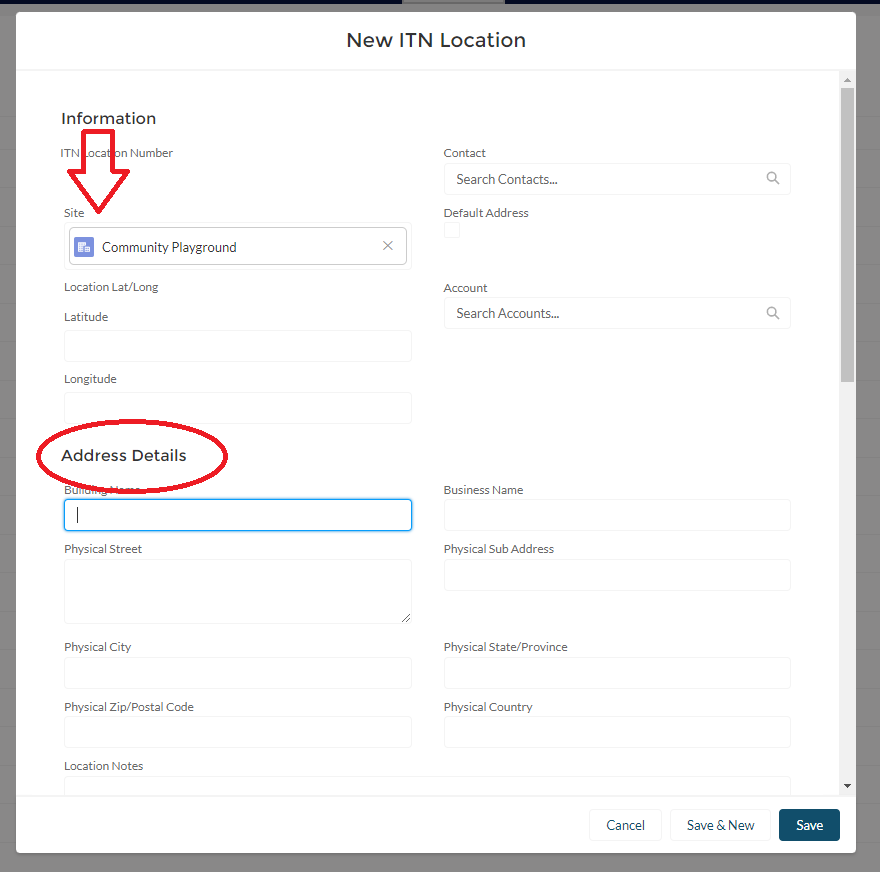
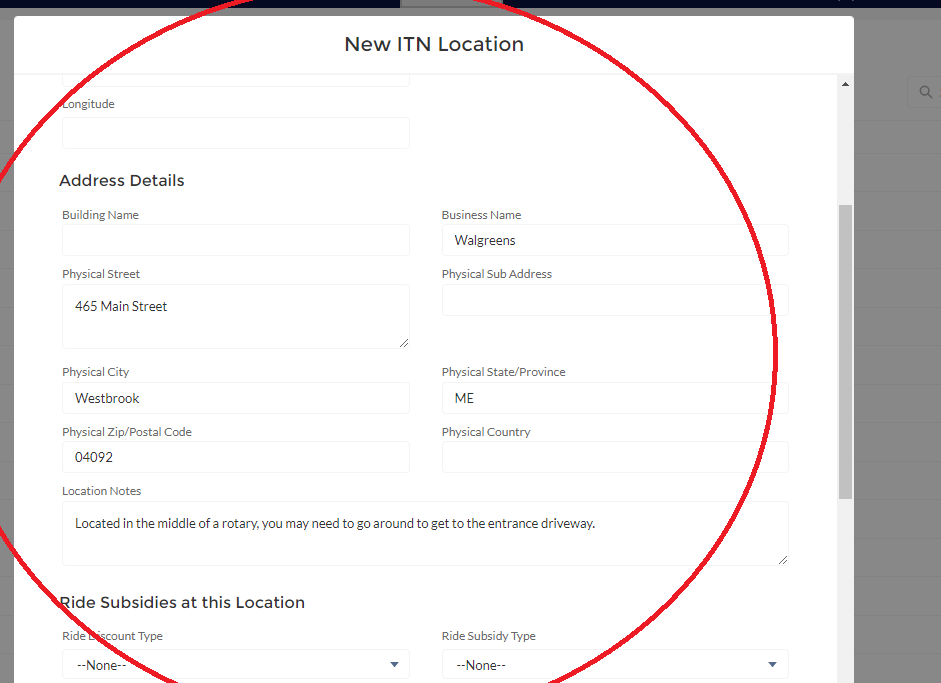
Enter the address details, being sure to include building and business name if applicable. This form has a separate box for a sub address, so apartment numbers and suites should be entered there. Include any location notes that will be helpful to your drivers.
Complete the ride subsidies portion, if applicable (more details in the Rides Services, Ride & Shop, and Healthy Miles instructions sections). Do not fill out anything under ESRI Error Codes or System Information. Save the address. If the address is valid, the longitude and latitude will be saved, and a new ITN Location will be created.