
Entering and Activating Drivers
All drivers are entered through the application on the site’s landing page on the ITNCountry.org website. These applications will import the person’s information into the ITNRides 2.0 software, so it is recommended that you only have a paid driver complete this application after an initial screening to help limit the number of unneeded applications submitted.
Volunteer Application
Click on the volunteer driver application button on the landing page on the site’s website.
Complete all required information. Please note, most of the questions on the application are required.
If the application cannot be completed in one sitting, save the application by clicking on “Save and Complete Later” at the top of the page. To return to the application, click on the applications button as you did when you began to enter it, and select “Open a Saved Application”.
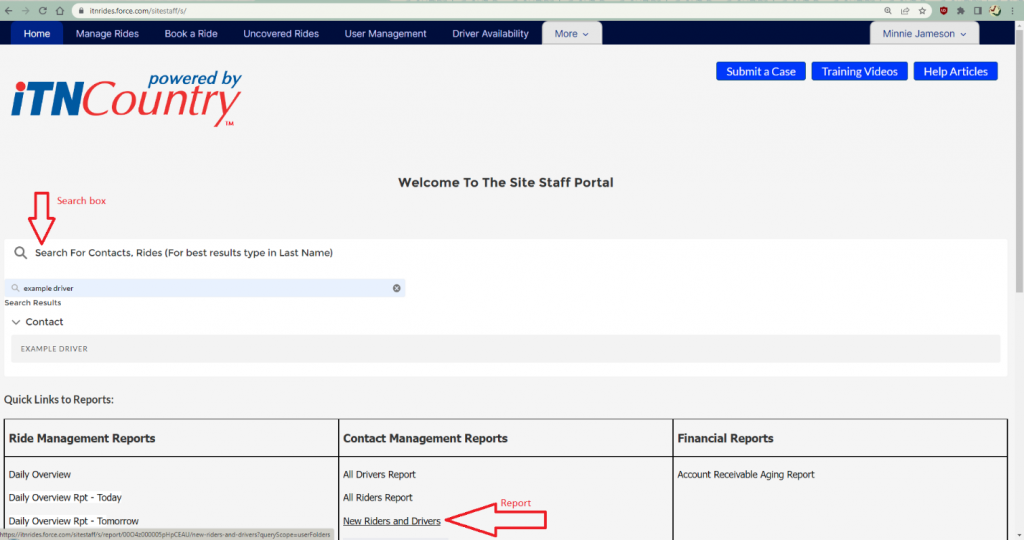
An email is sent to the site every time an application is submitted. New applications can be found in the New Riders and Drivers Report. This report is updated nightly, so the new contact will show up the day after they enter their application. The New Riders and Drivers report can be found on the homepage. The contact is added to the system as soon as the application is submitted, so you do not have to wait for them to show to on the report to activate them.
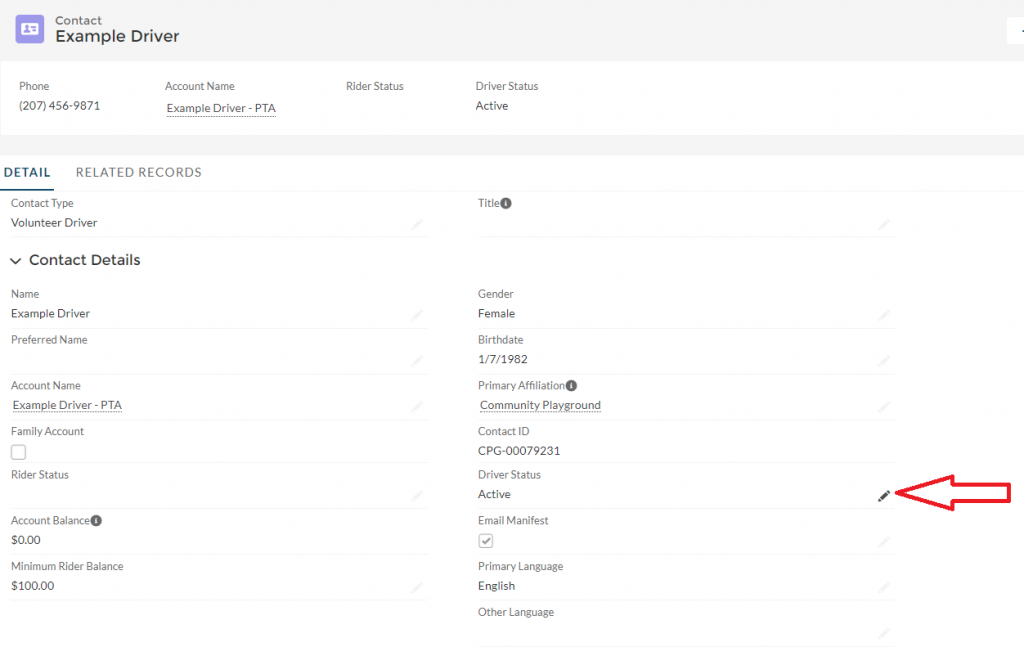
Select the new driver you want to activate from the report list or by entering their name in the search box on the homepage. The driver’s status will be inactive.
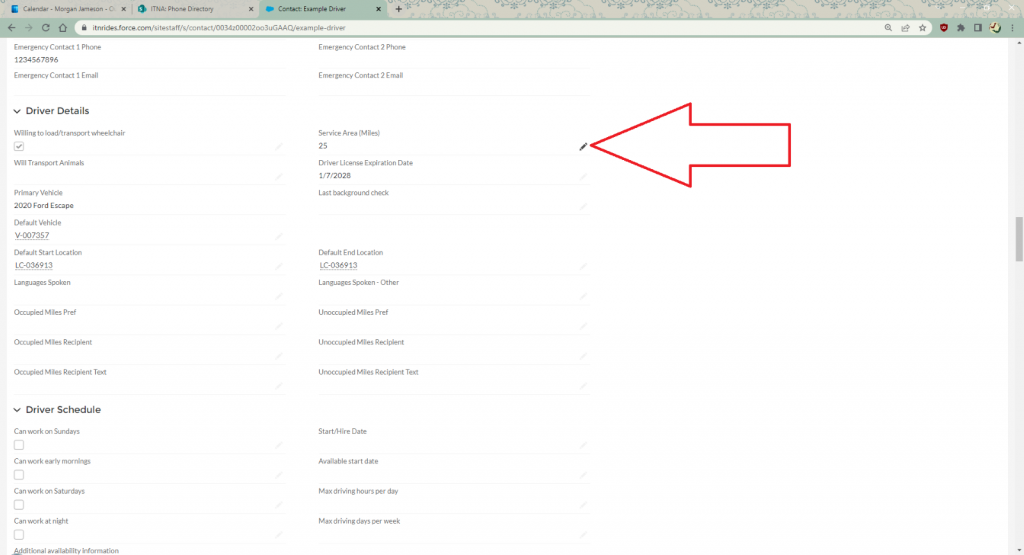
Once you have opened the Driver Contact page, scroll down to the “Driver Details” section and click on the pencil next to Service Area (Miles). This will open the entire page for editing. Enter the number of miles the driver is willing to drive (from their own address) in this field. The system will only allow drivers to be assigned to rides within this distance from their address.
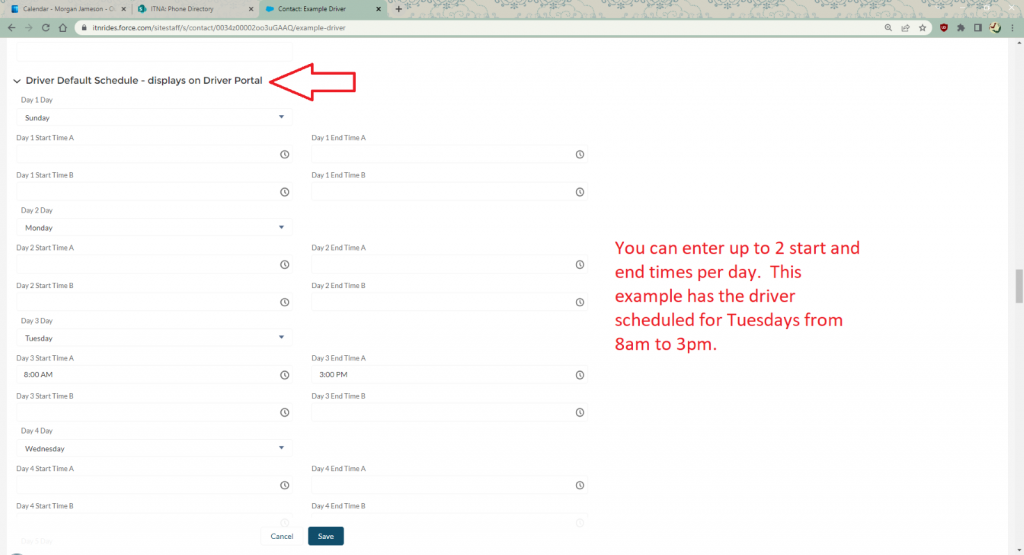
Scroll down to the section of the page that says “Driver Default Schedule- displays on Driver Portal”. In this section, enter the regular weekly schedule for the volunteer. You can enter up to two time slots for each day of the week. Click Save.
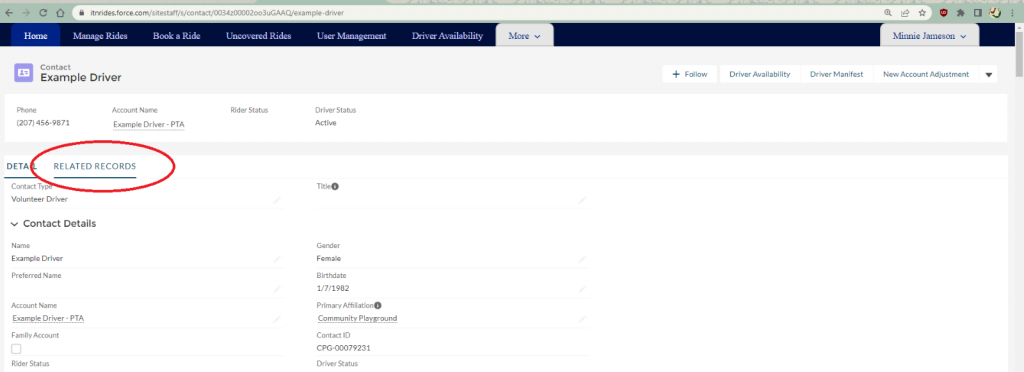
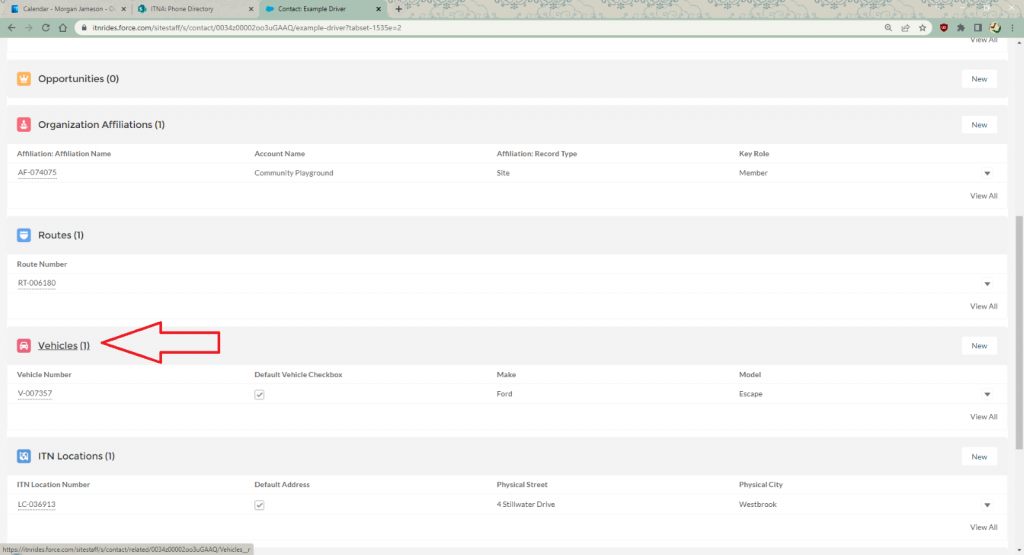
Scroll back to the top of the page, and click on “Related Records”.
Scroll down to Vehicles. Some drivers will have entered a vehicle when completing the application. If the driver did not enter the vehicle, and gave you the information during their interview or training, you will enter it now. Even if the driver has entered the vehicle, you need to adjust the mobility aids and special needs matching information.
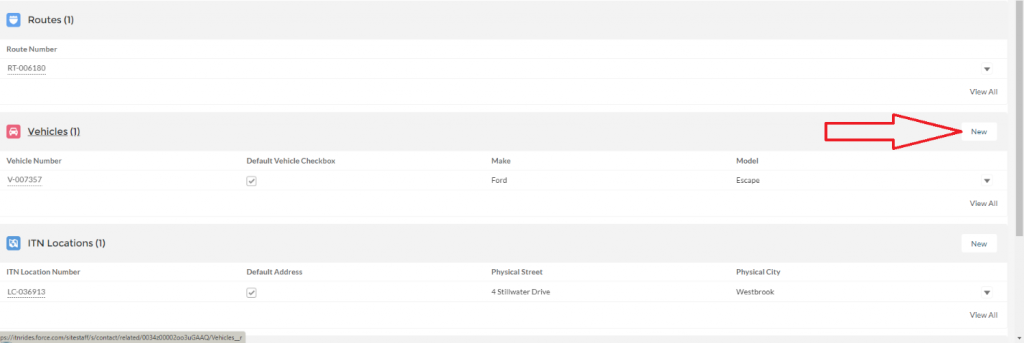
If no vehicle has been entered, click “New” to enter a new vehicle. This will open a form for you to fill out.
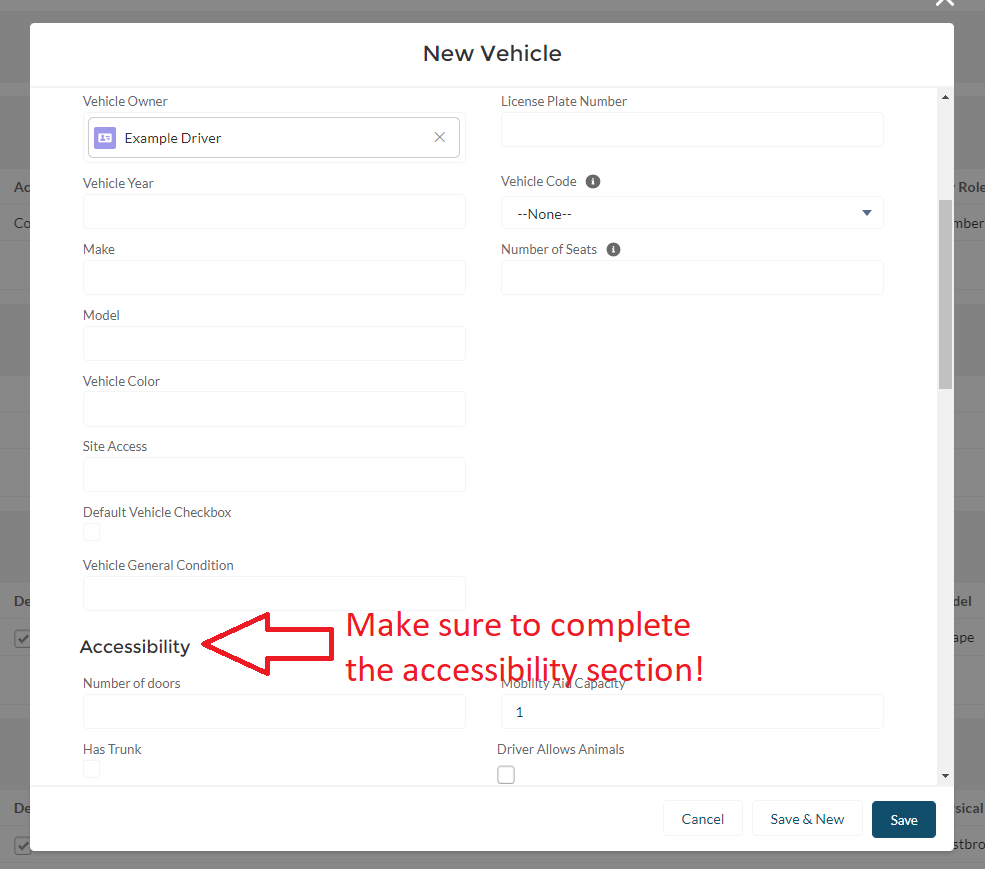
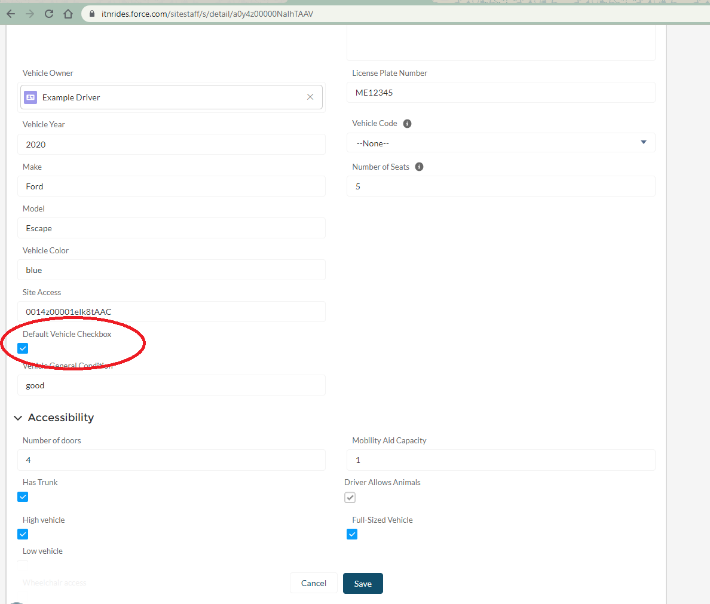
Complete the form with as much information as you have, be sure to complete the Accessibility section to ensure correct matching when creating routes. Be sure to check full-size vehicle if the vehicle could comfortably sit a larger person. (Many riders check off they need a full size vehicle and this must be checked on the car to be able to match the driver with the rider). Not all fields are required, and some programs may not use sections tracking things like car maintenance.
If a vehicle was entered when the application was submitted, click on the vehicle to open the record and scroll down to the Accessibility section to fill in the information necessary for generating routes. Be sure to check full-size vehicle if the vehicle could comfortably sit a larger person. (Many riders check off they need a full size vehicle and this must be checked on the car to be able to match the driver with the rider).
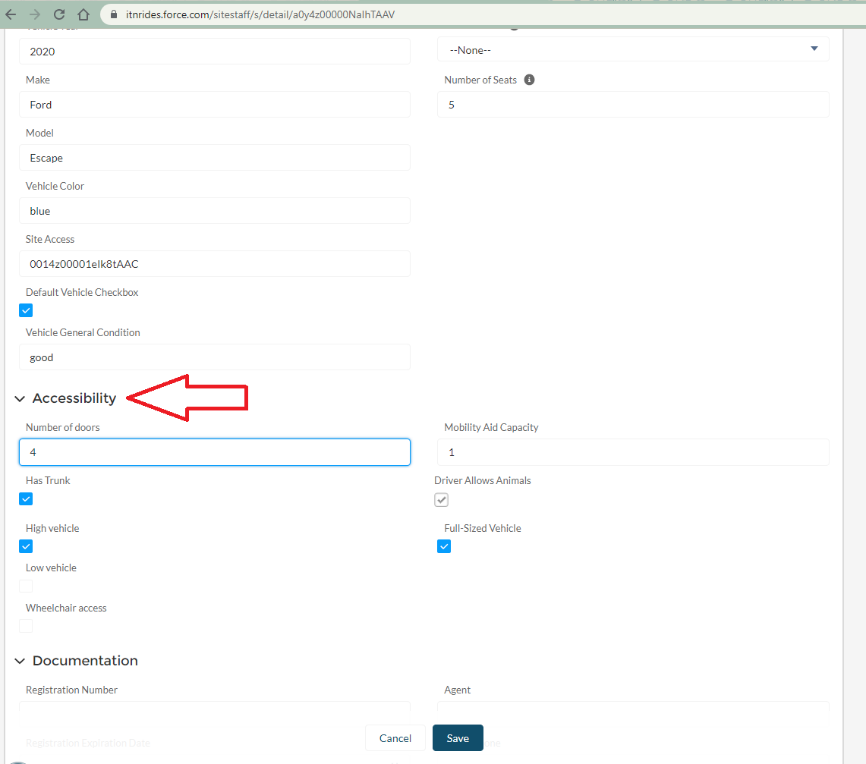
Check that the vehicle is checked off as the Default Vehicle (the checkbox is just above the Accessibility section).
Return to the driver’s Contact Record page, and check to see that they have a default start and end location. If they do not, go back to Related Records, and find their home address’s location ID under Locations. Enter the number (its easiest if you cut and paste) into the default start box and then choose that number from the drop down that opens. Repeat for the default end location so both are filled in with the driver’s home address location ID.
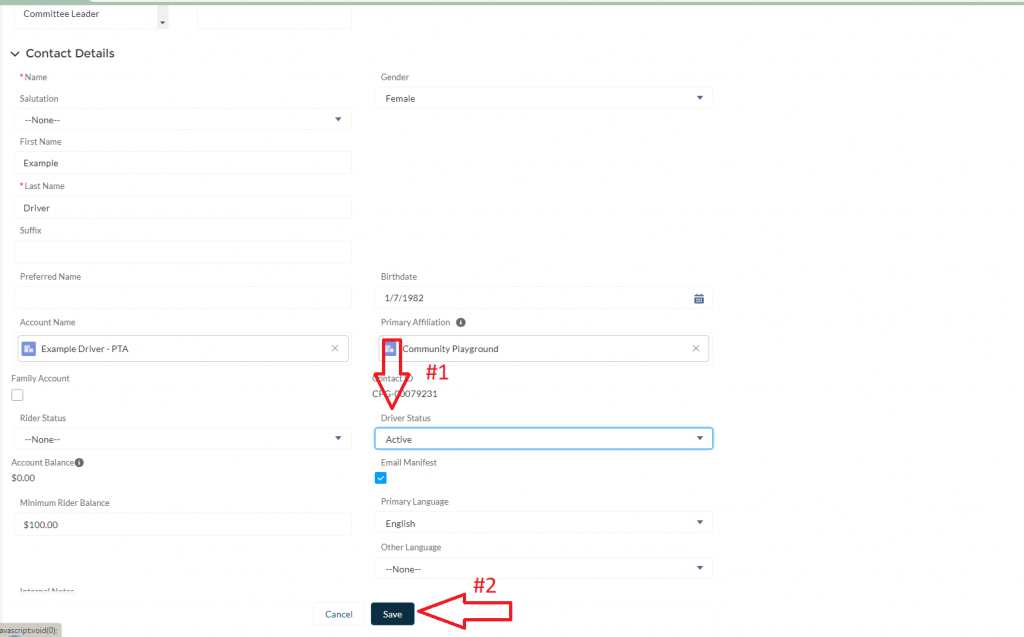
Return to the top of the page, and click the pencil next to the Driver Status field.
Change the account status from Admin Inactive to Active and save.
Now you can assign rides to the driver! If availability records have already been created for the week, you may need to use the Adjust Availability button to make the driver appear on the daily schedule at first, but the schedule you entered will be automated going forward.